












Understanding EQ: A Beginner's Guide to Equalization

Equalization is one of the most powerful tools in audio production, yet it's often misunderstood by beginners. At its core, EQ lets you adjust the balance of different frequencies in a sound — making some louder, others quieter, or leaving certain ranges untouched. Mastering this tool transforms how your mixes sound, helping individual instruments sit together without fighting for space. This guide breaks down what EQ actually does, how to use it effectively, and what to listen for when you're just starting out.
What Is Equalization?
Equalization is the process of adjusting the volume of specific frequency ranges within an audio signal. Think of it as a sophisticated tone control — similar to the bass and treble knobs on a car stereo, but with far more precision and flexibility.
Sound exists across a spectrum of frequencies, measured in Hertz (Hz). Human hearing typically ranges from 20Hz to 20,000Hz (20kHz). Low frequencies produce bass sounds, mid frequencies carry the body of most instruments and voices, and high frequencies create brightness and air. EQ gives you control over these ranges independently.
Every sound source occupies certain frequency ranges more than others. A kick drum lives primarily in the low end (50-100Hz), a snare drum has punch in the midrange (200-500Hz) and crack in the highs (3-5kHz), while a cymbal exists almost entirely in the high frequencies (8kHz and above). When you're mixing multiple instruments together, they often compete for the same frequency space. EQ helps you carve out room for each element.
Types of EQ Filters
Most equalizers offer several filter types. Understanding what each one does helps you choose the right tool for the job.
High-pass filters (also called low-cut filters) remove frequencies below a certain point. You set a cutoff frequency, and everything below it gets attenuated. This is useful for removing rumble, handling noise, or clearing mud from the low end of instruments that don't need bass frequencies. If you're recording vocals, a high-pass filter around 80-100Hz removes unnecessary low-end information without affecting the voice itself.
Low-pass filters (high-cut filters) do the opposite — they remove frequencies above your chosen cutoff point. These are less common in mixing but useful for taming harsh high frequencies or creating darker tones.
Bell filters (also called peaking filters) boost or cut a range of frequencies around a center point. You control three parameters: frequency (where the filter acts), gain (how much you boost or cut), and Q (how wide or narrow the affected range is). Bell filters are your main tool for shaping tone — adding warmth, reducing harshness, or emphasizing presence.
Shelf filters boost or cut everything above or below a certain frequency. A high shelf might lift all frequencies above 10kHz to add air and sparkle. A low shelf could reduce everything below 200Hz to thin out a muddy mix. Unlike bell filters, shelves affect a broad range rather than a focused band.
Frequency Ranges Explained
The audio spectrum divides into several regions, each with distinct characteristics:
- Sub-bass (20-60Hz): The lowest frequencies you feel more than hear. Kick drums, bass synths, and sub-bass live here. Too much energy in this range makes mixes sound muddy and unfocused.
- Bass (60-250Hz): The fundamental tones of bass instruments and the low end of most other instruments. This range provides warmth and power but can quickly overwhelm a mix if not controlled.
- Low midrange (250-500Hz): Where many instruments have body and weight. This range often gets congested in mixes — too much here sounds boxy and cluttered.
- Midrange (500Hz-2kHz): The core of most instruments and vocals. This is where presence and clarity live. Cuts here make things sound distant; boosts bring them forward.
- Upper midrange (2-4kHz): Adds definition and attack. Snare cracks, vocal consonants, and guitar pick attack exist here. Too much sounds harsh and fatiguing.
- Presence (4-6kHz): Creates clarity and intelligibility in vocals and lead instruments. Small boosts here make elements pop in a mix.
- Brilliance (6-20kHz): Air, shimmer, and sparkle. Cymbals, vocal breathiness, and acoustic guitar string noise occupy these frequencies. Too much sounds brittle; too little sounds dull.
Subtractive vs Additive EQ
You can approach EQ in two ways: cutting frequencies you don't want, or boosting frequencies you do want. Both have their place, but subtractive EQ generally produces cleaner results.
Subtractive EQ means removing problem frequencies. If a vocal sounds muddy, you cut around 200-400Hz rather than boosting the highs to compensate. If a guitar sounds harsh, you reduce the offending frequency instead of turning everything else up. This approach maintains headroom in your mix and avoids the buildup that happens when you boost multiple tracks.
Additive EQ means boosting desired frequencies. This works well for enhancing character or bringing elements forward, but it's easy to overdo. Every boost increases the overall level of that track, which can lead to clipping or force you to turn everything down to compensate.
A practical workflow: start by cutting problems, then add small boosts for enhancement if needed. Your ears will thank you.
Common EQ Mistakes Beginners Make
New producers often fall into predictable traps. Recognizing these patterns helps you avoid them.
Boosting too much. Small moves make big differences. A 3dB boost is noticeable; a 6dB boost is dramatic. If you're pushing 10-12dB, something else is wrong — you're trying to fix a problem that EQ can't solve, or you're working with a poor sound source. Start with 2-3dB adjustments and only go further if absolutely necessary.
Using EQ in isolation. Soloing a track and EQing it until it sounds perfect often leads to mixes that fall apart when everything plays together. What sounds great alone might not work in context. Make broad moves in solo, then fine-tune with other elements playing. A bass guitar that sounds thin on its own might sit perfectly in a dense mix.
Ignoring the low end. Bass frequencies build up quickly. If you're not using high-pass filters on instruments that don't need low end, your mix will sound muddy and lack punch. Not every track needs to be full-range. Vocals, guitars, and most midrange instruments benefit from removing frequencies below 80-100Hz.
Chasing frequency charts. Generic advice like "boost vocals at 5kHz" or "cut guitars at 400Hz" ignores the fact that every recording is different. Your ears are the final judge. Use frequency guides as starting points, not rules. The right frequency to adjust depends on the specific microphone, room, and performance you're working with.
Forgetting to reference. After staring at an EQ curve for 20 minutes, your ears adjust and you lose perspective. Take breaks. Compare your mix to professional recordings in the same genre. Your perception shifts over time — trust fresh ears more than tired ones. Listen at different volumes and on different speakers to catch problems you might miss on your main monitors.
Over-correcting phase issues. Aggressive EQ moves, especially with narrow Q settings, can introduce phase problems that make your mix sound hollow or thin. If something sounds worse after EQ but you can't figure out why, try widening your Q or using gentler curves. Phase coherence matters as much as frequency balance.
Practical EQ Techniques
Here are specific approaches that work across different mixing scenarios.
Sweeping for problems: Set a bell filter with a narrow Q and high gain (8-10dB boost). Sweep it across the frequency spectrum while the track plays. When you hit a frequency that sounds harsh, resonant, or unpleasant, you've found a problem area. Switch to a cut at that frequency with a moderate Q. This technique reveals issues you might not notice otherwise.
Creating space: When two instruments clash, cut one where the other is strongest. If your bass guitar and kick drum are fighting, try cutting the bass around 60-80Hz (where the kick lives) and cutting the kick around 200Hz (where the bass has body). This creates separation without making either element sound thin.
Adding clarity: A small high-shelf boost (1-2dB) above 8-10kHz can add air and openness to a mix. Start subtle — high-frequency boosts become harsh quickly.
Controlling harshness: If something sounds brittle or fatiguing, sweep between 2-5kHz to find the offending frequency. A narrow cut of 2-4dB usually solves the problem without making the sound dull.
Managing proximity effect: Close-miked vocals and instruments often have excessive low-end buildup (proximity effect). A high-pass filter around 80-100Hz cleans this up without affecting tone.
EQ on Mixing Consoles
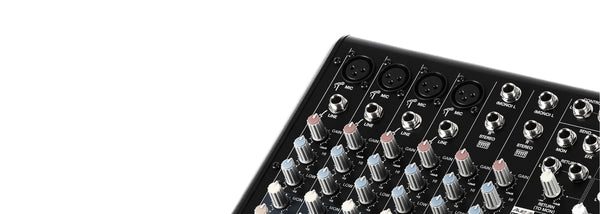
Hardware mixing consoles typically feature channel strip EQ — a small equalizer on each input channel. These are usually 3-band or 4-band designs with semi-parametric controls.
A typical channel EQ includes high and low shelving filters plus one or two bell filters for the midrange. Some consoles offer sweepable frequency controls (you choose the exact frequency), while others have fixed frequency points. The gain control adjusts how much you boost or cut, and the Q control (if present) adjusts the width of the affected range.
Console EQ has a distinct character. Analog circuits impart subtle harmonic distortion and phase shifts that many engineers prefer over digital EQ. This "color" can make tracks sound more cohesive and musical, though it's less precise than surgical digital EQ.
Modern hybrid consoles combine analog preamps and EQ with digital routing and effects. This gives you the warmth of analog signal paths plus the flexibility of digital recall and processing. For beginners learning EQ, this approach offers immediate hands-on control — you turn a knob and hear the result instantly, building the ear training that makes you a better mixer.
Building Your EQ Skills
EQ proficiency comes from deliberate practice, not just reading about it.
Start with simple material. Record a single vocal or instrument and practice identifying frequency ranges. Boost different areas and listen to what changes. Cut aggressively and hear what disappears. This builds your frequency vocabulary.
Train your ears with blind tests. Have someone else boost or cut a frequency while you guess where they made the change. This develops your ability to identify frequencies by ear rather than by looking at a graph.
Study professional mixes. Load a well-produced track in your DAW and use an EQ in analyzer mode to see its frequency balance. Notice where energy concentrates and where it's absent. Compare this to your own mixes.
Mix at low volumes. Loud playback makes everything sound better and masks problems. If your mix sounds balanced at conversation level, it will translate better across different playback systems.
Document what works. When you make an EQ move that solves a problem, write it down. Over time, you'll build a personal reference of starting points for common issues.
Our Recommendations
Learning EQ effectively means working with equipment that lets you hear what you're doing and experiment freely. These mixing consoles provide excellent platforms for developing your equalization skills, combining hands-on control with modern recording capabilities.


The PreSonus StudioLive AR16c bridges analog and digital workflows with 12 high-gain XMAX mic preamps and a musical 3-band analog EQ on every channel. The hybrid design lets you learn EQ fundamentals with tactile knobs while recording at up to 96 kHz via USB-C compatible USB 2.0 interface. Its built-in digital effects with reverbs and delays demonstrate how EQ interacts with other processing, and the Bluetooth connectivity lets you reference commercial tracks instantly.
The Tascam Model 12 combines a 10-input mixer with a 12-track recorder and DAW control in one compact unit. Its analog-style interface makes learning EQ intuitive — you adjust tone with physical controls while capturing every take to the integrated recorder or your computer via USB. The podcasting capability including mix-minus functionality shows how EQ applies beyond music production.
The Allen & Heath ZED60-10FX delivers professional mixer quality with 4 mono and 2 stereo channels. Its built-in effects processor lets you experiment with EQ in both live and studio contexts, while USB recording support connects directly to your DAW for detailed comparison of different EQ approaches. The analog signal path provides the tonal character that helps develop your ear for frequency balance.
The Allen & Heath ZED-10FX offers similar features in a more compact format with 4 mono and 2 stereo channels. Its straightforward layout helps beginners focus on core EQ concepts without overwhelming options. The built-in effects and USB functionality provide a complete learning environment for understanding how equalization fits into a signal chain.
Explore Mentioned Brands


Frequently Asked Questions
Should I EQ before or after compression?
Both orders work depending on your goal. EQ before compression shapes the frequencies that the compressor responds to — useful if you want the compressor to focus on specific ranges. EQ after compression corrects tonal changes the compressor introduced. Many engineers use both: broad corrective EQ before compression, subtle enhancement EQ after. Experiment with both approaches and trust your ears.
How much EQ is too much?
If you're making cuts or boosts larger than 6-8dB, you're likely fighting a problem that EQ can't fix. Extreme moves usually indicate issues with the source recording, microphone placement, or arrangement. Small adjustments (1-3dB) often produce better results than dramatic curves. If you find yourself applying heavy EQ to every track, step back and address the root cause.
Do I need to EQ every track in a mix?
No. Only EQ when you have a specific problem to solve or enhancement to make. Some tracks sound perfect as recorded and need no adjustment. Others might only need a simple high-pass filter. Starting with the assumption that every track needs EQ leads to over-processing and muddy mixes. Let good recordings speak for themselves.
What's the difference between analog and digital EQ?
Analog EQ uses physical circuits to shape frequencies, imparting subtle harmonic distortion and phase shifts that many find musical. Digital EQ uses mathematical algorithms, offering more precision and flexibility without adding coloration (unless designed to emulate analog behavior). Neither is inherently better — analog EQ often sounds more cohesive and forgiving, while digital EQ provides surgical precision and total recall. Modern hybrid consoles give you both.


