












Best Wall Panels for Recording Studio in Canada 2026

Recording studios demand precise acoustic control, and the right wall panels make all the difference between muddy mixes and clear, professional sound. We tested acoustic wall panels available in Canada across different price points and materials, focusing on absorption performance, installation ease, and real-world studio applications. All prices are in CAD, and these panels ship across Canada from Blackout Audio in Toronto.


Best for Critical Listening: Primacoustic Broadband Panel
The Primacoustic Broadband Panel handles professional recording environments where acoustic accuracy matters most. At $1,124.99 for a 24" x 48" panel, this is the choice for mixing rooms and mastering suites.
These panels work across vocal booths, control rooms, and live rooms. The broadband design treats a wide range of frequencies with a single panel type, which simplifies room treatment planning. You won't need separate bass traps and mid-high absorbers scattered around the room.
The square-edge design lets you mount panels tight together for wall coverage, or space them strategically at reflection points. They're dense enough to handle serious acoustic problems but light enough for standard wall mounting. Installation is straightforward with adhesive or impaling clips.
The grey finish blends into most studio aesthetics without drawing attention. For studios doing client work or streaming, that professional appearance matters as much as the acoustic performance.
Best Eco-Friendly Option: Primacoustic ECOScapes Panel
The Primacoustic ECOScapes Panel brings effective absorption at $479.99 without the fiberglass concerns. Made from PET material, these panels contain no formaldehyde, VOCs, or chemical binders. You can handle them during installation without gloves or respirators.
The 1' x 2' glacier finish works in home studios where you need acoustic treatment that doesn't scream "recording studio." These panels look deliberate, not industrial. The PET construction is impact-resistant and won't discolor over time like some foam products.
You can cut these panels to size with standard tools, which matters when you're treating odd corners or working around electrical boxes. They mount with screws, adhesive, or bolts depending on your wall material. The high-density construction means they absorb effectively despite being thinner than traditional fiberglass panels.
For project studios in shared spaces or bedrooms, the non-allergenic, odorless material makes these panels practical. You're treating the room without introducing materials that might bother housemates or family.
Best Budget Starter Pack: Gator Acoustic Panel 4-Pack
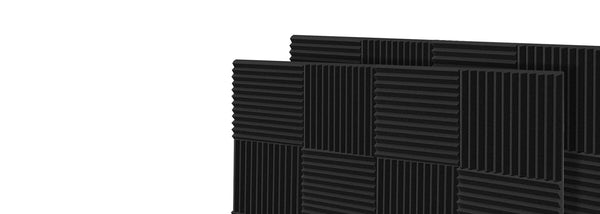
The Gator 4-Pack gets you started with acoustic treatment for $69. Four 12" x 12" charcoal pyramid panels cover early reflection points or corner clusters in a bedroom studio setup.
These panels handle the frequencies that cause the most obvious problems in untreated rooms. That ringing, echo quality you hear in empty spaces goes away when you place these at first reflection points beside your monitors. The pyramid texture increases surface area for better absorption.
The 12" square format is manageable for renters who can't drill large mounting holes. You can use adhesive strips or mounting putty to position these panels, then remove them without wall damage when you move. Four panels let you treat the critical zones behind your monitors and on the side walls.
The charcoal color works in most studio spaces without looking like obvious acoustic foam. For producers just starting to address room acoustics, this pack provides immediate improvement at a price that won't delay other gear purchases.
Comparison Table
| Product | Best For | Price (CAD) | Material | Size |
|---|---|---|---|---|
| Primacoustic Broadband Panel | Professional mixing rooms | $1,124.99 | High-density glass wool | 24" x 48" |
| Primacoustic ECOScapes Panel | Eco-conscious home studios | $479.99 | PET (no VOCs) | 1' x 2' |
| Gator 4-Pack | Budget bedroom studios | $69 | Acoustic pyramid panels | 12" x 12" (4-pack) |
How to Choose Acoustic Wall Panels
Start by identifying your room's problems. Clap your hands in the space. If you hear a distinct echo or ringing, you need absorption on your walls and ceiling. If bass notes linger or sound muddy, you need thicker panels or dedicated bass traps.
Coverage matters more than individual panel quality. Four strategically placed budget panels will outperform one expensive panel. Focus on first reflection points: the spots on your side walls and ceiling where sound bounces from your monitors to your listening position. Treat those zones first.
Material choice depends on your installation constraints. Fiberglass panels like the Broadband absorb effectively but require careful handling. PET panels are safer to work with and can be cut to fit. Pyramid panels are the lightest and easiest to mount temporarily.
For home studios in shared spaces, consider how the panels look. Neutral colors and clean edges help acoustic treatment blend into the room rather than dominate it. Professional studios can prioritize performance over aesthetics, but most of us need both.
Worth Exploring


Best for Custom Design
The Primacoustic Paintable Panel at $559.99 lets you match your studio's color scheme without sacrificing acoustic performance. The textured latex finish accepts spray paint, so you can coordinate with existing decor or brand colors. The 2' x 4' size covers significant wall area, and the beveled edges create clean lines when mounted in groups.
Best for Large Wall Coverage
The Primacoustic ECOScapes 4' x 4' Panel at $844.99 provides maximum coverage with minimal seams. The ivory finish works in bright, modern spaces where dark panels would feel heavy. This size makes sense for treating entire walls in larger rooms, and the PET construction means you can cut it down if needed. The same eco-friendly benefits as the smaller ECOScapes panels, scaled up for serious wall coverage.
Explore Mentioned Brands


FAQ
How many acoustic panels do I need for a home studio?
Start with 6-8 panels covering 20-30% of your wall surface. Place them at first reflection points beside your monitors, on the wall behind your listening position, and in corners where sound builds up. You can always add more panels after testing how the room sounds, but starting with strategic placement beats covering every wall randomly.
What's the difference between foam panels and fiberglass panels?
Fiberglass panels absorb more sound per inch of thickness, especially in lower frequencies. They're denser and more effective but require careful handling during installation. Foam and pyramid panels are lighter, easier to mount, and work well for treating reflections. PET panels split the difference with good absorption, easy handling, and no health concerns during installation.
Can I install acoustic panels without damaging walls?
Yes. Use adhesive strips rated for the panel weight, mounting putty, or hook-and-loop fasteners. These methods work for lighter panels. Heavier fiberglass panels need more secure mounting like impaling clips or Z-clips, which do require small holes but are easy to patch later.


