














How to Record Vocals at Home

Recording vocals at home has never been more accessible, but getting professional-sounding results still requires understanding the fundamentals. Your microphone choice matters, but so does your room, your technique, and how you process the signal. This guide walks you through the essentials — from choosing the right mic to setting up your space and capturing a clean take. You don't need a professional studio to get radio-ready vocals, but you do need to know what you're doing.
Choosing the Right Microphone
Your microphone is the first link in the recording chain, and it shapes everything that follows. For home vocal recording, you're choosing between two main types: condenser and dynamic.
Condenser microphones are sensitive and detailed. They capture the full frequency range of your voice, including subtle breath sounds and high-end air. This makes them excellent for sung vocals, voiceover work, and any application where clarity matters. The trade-off is that they pick up room noise easily. If your recording space isn't treated, a condenser will capture reflections, traffic noise, and your neighbor's dog. The Audio-Technica AT2020 exemplifies this type — its large-diaphragm capsule delivers extended frequency response and captures vocal nuance that dynamic mics miss.
Dynamic microphones are less sensitive and more forgiving. They reject off-axis sound better, which means less room noise in your recording. This makes them ideal for untreated spaces or louder vocal styles like rock, metal, or rap. They're also nearly indestructible — drop one and it'll keep working. The Shure SM58 has been the industry standard for decades precisely because it delivers warm, clear vocals while minimizing background noise, even in challenging acoustic environments.
Both types use a cardioid polar pattern for home recording. This heart-shaped pickup pattern captures sound from the front while rejecting sound from the sides and rear. Stand directly in front of the mic, and background noise stays out of your recording.
Audio Interface and Signal Chain
Your microphone needs to connect to your computer, and that connection determines your sound quality. Most modern microphones use an XLR output, which requires an audio interface to convert the analog signal to digital.
An interface provides phantom power for condenser microphones (typically 48V) and includes a preamp to boost the mic's signal to a usable level. Look for an interface with at least one XLR input and a headphone output for monitoring. USB-C connectivity is standard in 2026 and works with both Mac and Windows systems.
Some microphones now include USB output, eliminating the need for a separate interface. The Shure MV7X offers both XLR and USB connectivity, giving you the flexibility to start simple and expand your setup later. These hybrid designs are convenient for beginners, but dedicated interfaces offer better preamps and more routing flexibility as your needs grow.
Your signal chain for a standard vocal recording looks like this:
- Microphone captures your voice
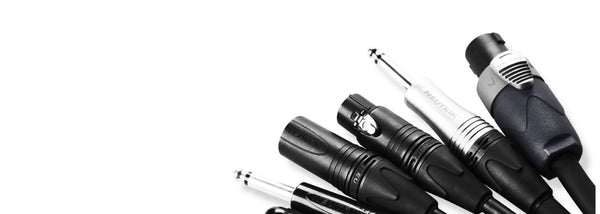
- XLR cable carries the signal to your interface
- Interface preamp boosts the signal and converts it to digital
- Computer receives the digital signal via USB
- DAW software records and processes the audio
Keep your cables short and use balanced XLR connections to minimize noise. A 10-foot cable is enough for most home setups.
Room Treatment and Positioning
Your room affects your recording more than most beginners realize. Hard surfaces reflect sound, creating echoes and resonances that muddy your vocal. You don't need to build a professional vocal booth, but you do need to control reflections.
Start with basic acoustic treatment:
- Hang thick blankets or moving blankets on the wall behind you
- Place acoustic foam or absorption panels at reflection points (walls to your left and right)
- Put something soft on the floor if you're recording on hardwood or tile
- Record in a smaller room — large spaces create longer reverb tails
Position your microphone 6-12 inches from your mouth. Closer creates a warmer, more intimate sound with more bass (proximity effect). Farther back captures more room tone and reduces plosives. Experiment to find what works for your voice and space.
Use a pop filter between your mouth and the mic. This fabric or metal screen diffuses plosive sounds (hard P and B sounds) that would otherwise overload the diaphragm. A pop filter costs less than twenty dollars and solves a problem you can't fix in post-production.
Face away from hard surfaces. If your mic is pointing at a bare wall, that wall reflects sound back into the rear of the capsule, creating phase issues. Turn the mic so it points toward a treated surface or into a corner.
Setting Input Levels
Proper gain staging prevents clipping (digital distortion) and keeps your noise floor low. Your goal is to record hot enough to capture detail without hitting 0 dBFS.
Start with your interface gain knob at 12 o'clock. Sing or speak at your loudest performance level. Watch the input meter in your DAW. Your peaks should hit between -12 dB and -6 dB. If you're clipping (hitting 0 dB and turning red), turn the gain down. If your peaks barely register, turn it up.
Most interfaces have a clip indicator light. If it lights up, you're too loud. Back off the gain until it stays dark, even during your loudest moments.
Record in 24-bit resolution. This gives you more headroom and dynamic range than 16-bit, meaning you can record at lower levels without introducing noise. For sample rate, 44.1 kHz and 48 kHz are both standard choices. The difference between them is negligible for vocal recording — 44.1 kHz is CD quality and 48 kHz is video standard. Higher sample rates like 96 kHz or 192 kHz don't improve vocal quality in any audible way and just create larger files that strain your computer's processing power.
Monitoring and Latency
You need to hear yourself while recording, but computer processing introduces latency — a delay between when you sing and when you hear it in your headphones. This delay makes it impossible to perform naturally.
Most audio interfaces offer direct monitoring, which routes your mic signal directly to your headphones before it hits the computer. This eliminates latency completely. Enable direct monitoring on your interface and adjust the mix knob to balance between your voice and the backing track.
If your interface doesn't have direct monitoring, reduce your DAW's buffer size to minimize latency. A buffer size of 128 or 64 samples keeps latency under 10ms, which is imperceptible for most people. Just remember to increase the buffer size back to 512 or 1024 samples when mixing — low buffer settings strain your CPU and can cause clicks, pops, or dropouts when running multiple plugins.
Use closed-back headphones for tracking. Open-back headphones leak sound, which bleeds into the microphone and creates a muddy recording. Closed-back designs isolate your ears and keep the backing track out of the mic. This is especially important with sensitive condenser microphones that pick up everything in the room.
Recording Technique
Good technique starts before you press record. Warm up your voice. Drink water. Clear your throat. These basics matter more than any plugin.
Maintain consistent mic distance throughout your take. Moving closer and farther creates volume and tonal shifts that are difficult to fix later. If you need dynamic variation, control it with your voice, not your position.
Work the proximity effect intentionally. Dynamic and cardioid condenser mics boost bass frequencies when you're close. This warmth works for intimate ballads and spoken word. For brighter, more present vocals, back off a few inches. The SM58's tailored frequency response is designed to complement this effect, delivering clear vocals even when you're working close to the capsule.
Turn your head slightly off-axis for sibilant sounds (S, T, SH). This reduces harshness without losing clarity. You're still singing into the mic, just not aiming those frequencies directly at the capsule.
Record multiple takes. Your first take is rarely your best. Do three to five full passes, then comp the best moments from each into a final performance. This is standard practice in professional studios.
Basic Vocal Processing
Raw vocal recordings need processing to sit properly in a mix. Start with these fundamentals:
High-pass filter: Roll off everything below 80-100 Hz. These frequencies are rumble and room noise, not your voice. A steep 12 dB/octave or 18 dB/octave slope cleans up the low end without thinning your vocal.
Compression: A compressor evens out volume differences, making quiet phrases audible and loud phrases controlled. Start with a ratio of 3:1 to 4:1, medium attack (10-30ms), and medium-fast release (100-200ms). Aim for 3-6 dB of gain reduction on your loudest parts.
De-essing: A de-esser is a frequency-specific compressor that tames harsh S sounds. Set it to trigger around 5-8 kHz and reduce by 3-6 dB when sibilance occurs. Too much and your vocal sounds lispy.
Reverb and delay: These create space and depth. Short reverbs (under 1 second) add dimension without washing out the vocal. Delays create rhythmic interest. Keep effects subtle — you should feel them more than hear them.
Process in this order: EQ (high-pass) → compression → de-esser → EQ (tonal shaping) → reverb/delay. This signal flow prevents common problems like compressing sibilance or EQing reverb tails.
Common Problems and Solutions
Every home recording setup encounters these issues. Here's how to fix them:
Room echo: Add more absorption. Hang blankets on walls, record in a closet full of clothes, or build a simple reflection filter behind the mic. You can't EQ out room sound — you have to prevent it at the source.
Background noise: Turn off fans, air conditioning, and appliances. Close windows. Record at night when traffic is minimal. Use a dynamic mic if you can't control the environment. The SM58's cardioid pattern is specifically designed to target your voice while minimizing background noise, making it an excellent choice for less-than-ideal recording spaces. A noise gate helps but isn't a substitute for a quiet room.
Plosives: Use a pop filter. Position it 2-3 inches from the mic capsule. If plosives still get through, increase your mic distance or angle the mic slightly downward so you're singing over the top of the capsule instead of directly into it.
Thin or weak sound: Move closer to the mic to engage proximity effect. Check that phantom power is enabled for condenser mics. Boost around 200-400 Hz to add body, but cut the same range if the vocal sounds muddy.
Harsh or brittle tone: Back off the mic. Cut 2-4 kHz to reduce edge. Use a dynamic mic instead of a condenser if your voice is naturally bright. Make sure you're not overdriving the preamp — distortion adds harshness you can't remove.
Our Recommendations
These microphones cover the essential use cases for home vocal recording, from entry-level condensers to versatile dynamics that work in untreated rooms.


The AT2020 delivers condenser clarity at an accessible price point, making it the standard recommendation for treated home studios. Its custom-engineered low-mass diaphragm provides the extended frequency response and transient detail that makes vocals sound polished and professional. The SM58 brings live-sound durability to the bedroom, rejecting room noise better than any condenser while delivering the warm, clear vocal reproduction it's been known for since its introduction. For mobile recording or minimal setups, the iRig Mic connects directly to your phone or tablet with built-in monitoring, perfect for songwriters capturing ideas on the go. The MV7X bridges the gap between USB convenience and XLR flexibility, with voice isolation technology that helps in less-than-ideal spaces and enough SPL handling to work for aggressive vocal styles.
Start Recording Today
Recording vocals at home comes down to controlling what you can and working around what you can't. You don't need perfect acoustics or expensive gear to capture usable takes. Focus on the fundamentals: choose the right mic for your space, treat your room as much as possible, set proper levels, and develop consistent technique. The difference between a demo and a release-quality vocal is rarely the equipment — it's the attention to detail in how you use it.
Start with one of the microphones above and a basic interface. Learn to position yourself correctly, monitor without latency, and apply simple processing. As you develop your ear and your technique, you'll know exactly where to invest next. Your voice is the instrument. The microphone just captures it.
Explore Mentioned Brands


FAQ
Do I need an expensive microphone to record good vocals at home?
No. Microphones in the $100-300 range capture professional-quality vocals. Your room treatment, interface preamps, and recording technique matter more than the mic price. A $150 condenser in a treated space will outperform a $1000 mic in a bare room every time.
Should I use a condenser or dynamic microphone for vocals?
Use a condenser if your room is treated and you want detailed, airy vocals. Use a dynamic if your space is untreated, noisy, or you're recording loud vocal styles. Condensers capture more nuance but also more room problems. Dynamics are more forgiving but require more gain and closer mic technique.
How do I reduce background noise in my vocal recordings?
Control the source first: turn off appliances, close windows, record at quiet times. Use a cardioid polar pattern and position the mic so its rejection zone faces the noise source. Dynamic microphones reject more background sound than condensers. A noise gate helps during mixing but can't fix a noisy recording.
What is phantom power and do I need it?
Phantom power is 48V of DC current that condenser microphones need to operate. Your audio interface supplies it via the XLR cable. Enable it for condenser mics, disable it for dynamic mics. Leaving it on won't damage a dynamic mic, but it wastes power and can cause issues with certain ribbon microphones.


