


Understanding Monitor Placement and the Listening Triangle
Getting your studio monitors in the right spot is one of the fastest ways to improve what you hear. You can drop thousands on high-end speakers, but if they're aimed at the wall or sitting too close together, you're not hearing what your mix actually sounds like. The listening triangle is the foundation of monitor placement — a simple geometric concept that ensures you're sitting in the sweet spot where stereo imaging, phase coherence, and frequency response all line up. Here's how to set it up and why it matters.
What Is the Listening Triangle?
The listening triangle is an equilateral triangle formed by your two monitors and your head. Each side of the triangle should be the same length — typically between 3 and 5 feet, depending on your room size and monitor type. Your left monitor, right monitor, and listening position are the three points.
This geometry matters because it creates a centered stereo image. When both speakers are equidistant from your ears, sound arrives at the same time from each side. Panning decisions become clear. Phase relationships stay intact. You hear the mix as it was intended, not a skewed version where one side dominates.
Most nearfield monitors are designed to be heard from 3 to 4 feet away. Sitting closer can make the sound feel unbalanced or overly detailed. Sitting farther back means you're hearing more of the room and less of the speakers — reflections off walls, ceilings, and furniture start to color the sound.
Monitor Height and Ear Level
Tweeters should be at ear height when you're seated. This is where the high-frequency driver is designed to aim. If your monitors are sitting directly on your desk, the tweeters are probably firing at your chest or chin. You're missing the top end or hearing it off-axis, which dulls transients and makes cymbals sound muffled.
Use monitor stands or isolation pads to lift the speakers. Stands are better — they decouple the monitors from your desk, reducing vibrations that travel through the furniture and smear low-end detail. Isolation pads are a cheaper option that still helps with height and decoupling.
Tilt is also worth checking. Some monitors have a slight downward angle built into their design. If yours don't, you can angle them slightly toward your ears using foam wedges or adjustable stands. The goal is to point the tweeter directly at your head, not at the wall behind you.
Distance from Walls and Corners
Bass frequencies build up near walls and especially in corners. If your monitors are shoved against the back wall, you're hearing exaggerated low end. Mixes done in this setup will sound thin everywhere else because you've been compensating for a bass boost that doesn't exist outside your room.
Pull your monitors at least 6 to 12 inches away from the wall behind them. More is better if your desk allows it. Some monitors have rear ports for bass reflex — these need even more breathing room. A rear-ported speaker placed against a wall will sound boomy and undefined.
Corners are the worst offenders. Low frequencies reflect off two walls at once, creating massive peaks. If you have no choice but to place monitors near a corner, use bass traps to absorb some of that energy. Many modern monitors also include EQ switches on the back panel — a low-shelf cut can help tame excessive bass buildup.
Speaker Angle and Toe-In
Once your monitors are positioned at equal distances from your head, angle them inward so they're aimed at your ears. This is called toe-in. The tweeters should point directly at you, not straight ahead.
Toe-in improves stereo imaging and high-frequency clarity. It also reduces early reflections — sound bouncing off the side walls before reaching your ears. These reflections arrive slightly delayed and cause comb filtering, which smears the stereo image and makes it harder to place instruments in the mix.
A good starting point is 30 degrees of toe-in per speaker. If you're sitting in the center of the triangle, each monitor should be rotated about a third of the way toward you. You can fine-tune this by ear. Play a mono source panned center and adjust the angle until the image feels locked in the middle, not pulled left or right.
Room Acoustics and Treatment
Monitor placement is half the battle. The other half is controlling what happens to sound after it leaves the speakers. Bare walls reflect high frequencies. Parallel walls create flutter echoes. Untreated rooms turn your carefully positioned monitors into a reverb chamber.
Start with absorption panels at the first reflection points — the spots on the side walls where sound bounces directly from the speaker to your ears. Sit in your listening position and have someone hold a mirror flat against the wall. Move it until you can see the speaker in the mirror. That's your first reflection point. Put a panel there on both sides.
Bass traps in the corners handle low-frequency buildup. Ceiling clouds above your head reduce reflections from overhead. You don't need to cover every surface — too much absorption makes the room sound dead and lifeless. The goal is balance: control the worst reflections without killing the natural ambience.
Common Placement Mistakes
Placing monitors in an orientation that doesn't match their design is a frequent error. Many nearfield monitors are intended to be used vertically, with the tweeter above the woofer. Check your monitor's manual — some models are designed for horizontal placement, while others will have phase issues between the drivers if laid on their side. Using them in the wrong orientation can make the stereo image vague and harder to pin down.
Another mistake is setting monitors too far apart. If the triangle sides are longer than 5 feet, the center image starts to collapse. You'll hear hard left and hard right clearly, but anything panned slightly off-center will feel disconnected. Instruments won't sit in the mix — they'll jump from one side to the other with no middle ground.
Monitors sitting directly on the desk is also common. The desk surface acts as a resonator, vibrating along with the low end and muddying the sound. You lose definition in the bass and lower mids. Stands or isolation pads solve this by breaking the mechanical connection between the speaker and the desk.
Testing Your Setup
Once your monitors are in place, test the setup with reference tracks you know well. Play something with a strong center vocal — the voice should feel locked in the middle, not drifting left or right. If it sounds off-center, your monitors aren't equidistant from your head. Measure again and adjust.
Check low-end balance with a bass-heavy track. The bass should feel even across the frequency range, not boomy or thin. If it's boomy, you're too close to a wall or corner. If it's thin, you might be sitting in a null — a spot where bass frequencies cancel out due to room modes. Moving your listening position forward or backward a few inches can help.
Use a mono source to check phase coherence. Sum your mix to mono and listen for anything that disappears or gets quieter. If a sound vanishes in mono, there's a phase problem — often caused by reflections or misaligned speakers. Adjust toe-in and side-wall treatment to minimize these issues.
Our Recommendations
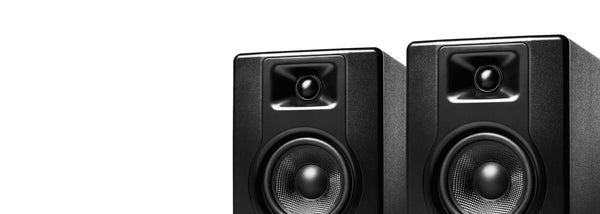
These monitors work well in typical home studio setups and are forgiving of less-than-perfect rooms. They're also sized appropriately for nearfield listening — you're not fighting excessive bass or struggling to hear detail from too far away.


The Pioneer DJ DM-50D uses a 5" fiberglass woofer and 3/4" soft-dome tweeter, powered by a class-D amplifier outputting 25W per channel at 4 ohms. It includes a DSP-driven DJ/Production switch, giving you two different voicings depending on your workflow. The smaller driver size makes it easier to place in tight spaces without overwhelming the room with low end.
The Adam Audio T5V pairs a 5" polypropylene woofer with Adam's U-ART 1.9" ribbon tweeter. The bi-amped design allocates 50W to the woofer and 20W to the tweeter, with a frequency response of 45 Hz to 25 kHz. Rear-panel controls for high-shelf and low-shelf EQ let you compensate for wall proximity or room modes without needing external processing.
The KRK Rokit 5 G5 includes three voicing modes — Create, Mix, and Focus — plus 25 bands of graphic EQ accessible through the KRK app. The bi-amped design provides up to 55W of Class-D amplification. The front-firing port gives you more flexibility in placement near walls, and the DSP-driven room tuning helps correct acoustic problems that can't be fixed with positioning alone.
Explore Mentioned Brands
FAQ
How far should studio monitors be from the wall?
At least 6 to 12 inches, and more if your monitors have rear ports. Bass frequencies build up near walls, creating an exaggerated low end that doesn't translate to other listening environments. If you can't move them farther away, use the low-shelf EQ on the back panel to reduce bass output.
What is the ideal listening triangle distance?
Between 3 and 5 feet per side for nearfield monitors. The triangle should be equilateral — each side the same length. Closer than 3 feet can make the sound feel unbalanced. Farther than 5 feet means you're hearing more room reflections than direct sound from the speakers.
Should studio monitors be angled toward you?
Yes. Angle them so the tweeters point directly at your ears. This is called toe-in, and it improves stereo imaging and reduces early reflections off the side walls. A good starting point is 30 degrees of rotation per speaker.
Can I place studio monitors horizontally?
It depends on the model. Many nearfield monitors are designed for vertical placement, and laying them horizontally can create phase issues between the tweeter and woofer. Check your monitor's manual to confirm the intended orientation. When used incorrectly, the stereo image becomes less focused and instruments won't sit in the mix as cleanly.


