


How to Set Up Studio Monitors Correctly
Why Monitor Placement Matters
You can own the best studio monitors in the world, but if they're sitting in the wrong spot, you're not hearing what you think you're hearing. Monitor placement isn't about following arbitrary rules — it's about physics. Sound waves interact with your room in predictable ways. Get the placement right and you hear an accurate mix. Get it wrong and you're compensating for problems that don't exist in your actual audio.
This guide covers the fundamentals: positioning, height, angle, and distance. You'll learn how to set up monitors in real-world rooms, not idealized spaces that don't exist. Most home studios have compromises. The goal is to minimize their impact.
The Equilateral Triangle Rule
Start here. Your two monitors and your head should form an equilateral triangle. If your monitors are three feet apart, you sit three feet back from the centerline between them. This geometry creates a stereo image where panning decisions translate accurately.
Measure from the acoustic center of each speaker — roughly where the tweeter sits — not from the front edge of the cabinet. Use a tape measure. Eyeballing it gets you close, but close isn't good enough when you're trying to hear a 1dB difference in a snare reverb.
Angle each monitor inward so the tweeters aim directly at your ears. Some engineers prefer a slight offset — tweeters crossing just behind the listening position — but that's fine-tuning. Get the triangle right first.
Height and Ear Level
Tweeters at ear height. That's the target. High-frequency content is directional. Sit six inches below the tweeter axis and you're hearing a different speaker than someone at the correct height.
If your monitors sit on a desk, you need stands or isolation pads that bring them up. Desktop placement without proper height adjustment puts the tweeters too low. You end up tilting the monitors upward to compensate, which changes how the drivers interact and muddies the stereo image.
Stands are better than stacking monitors on books or foam blocks. Dedicated speaker stands decouple the monitors from your desk, reducing vibration transfer. Your desk is a resonant surface. Every bass note that shakes it colors what you hear.
Distance from Walls
Walls reflect sound. Place monitors too close to a wall and you get bass buildup from boundary reinforcement. The effect is strongest in corners, where two or three surfaces meet. A monitor six inches from a rear wall sounds bassier than the same monitor three feet out.
Rear-ported monitors need breathing room. The port fires backward, and if there's a wall right behind it, the bass response gets uneven. The Adam Audio T5V has a rear-firing bass-reflex port that benefits from distance — aim for 18 to 24 inches from the wall. Front-ported designs like the KRK Rokit 5 G5 are more forgiving in tight spaces since the port fires forward, but they still benefit from some separation.
The standard guideline is at least 12 inches between the monitor and the wall behind it, but this varies by design. Compact monitors with smaller woofers can work closer to walls. The Genelec 8320A with its 4" woofer and 55 Hz to 23 kHz frequency response can sit closer than a monitor with a larger driver. If your room is small and distance isn't possible, use the built-in EQ or room correction features many monitors include. Cutting bass at the speaker level compensates for boundary gain.
Side walls matter too. Asymmetrical placement — one monitor close to a side wall, the other in open space — creates an unbalanced stereo field. Try to keep both monitors the same distance from their nearest side wall. If your room layout makes that impossible, treat the closer wall with absorption.
Avoiding the Desk Reflection Problem
Your desk is a reflective surface directly between you and the monitors. Sound hits the desk, bounces up, and arrives at your ears slightly delayed. This causes comb filtering — certain frequencies cancel out, others get louder. The result is a thin, phasey midrange.
Solutions:
- Raise the monitors higher so the direct sound clears the desk surface
- Tilt the monitors downward if they're on tall stands
- Place absorption material on the desk between you and the monitors — a thick mouse pad or small piece of acoustic foam helps
- Use monitor stands that position speakers behind the desk edge, not on top of it
Test this by listening to a vocal track with the monitors on the desk, then lifting them six inches. The vocal clarity improves immediately. That's the desk reflection disappearing.
Symmetry in the Room
Your listening position should be symmetrical relative to the room. Sit centered between the side walls. If you're off to one side, early reflections arrive at different times from the left and right, skewing the stereo image.
Avoid placing your setup in a corner. Corner loading amplifies bass and creates uneven frequency response. The center of a wall is better, but the center of the room is best — though not always practical in a working space.
If your room is rectangular, position the monitors along the short wall and sit facing into the length of the room. This minimizes early reflections from the side walls and gives you more distance before sound bounces back from the rear wall.
Testing Your Setup
Play a mono source — a vocal, a snare, a sine wave — panned center. Close your eyes. The sound should appear to come from a point exactly between the two monitors, not favoring left or right. If it drifts, your triangle isn't equilateral or the monitors aren't angled correctly.
Walk around the room while playing a bass-heavy track. You'll hear the low end get louder and quieter as you move. That's the room's modal response — standing waves caused by parallel walls. The spot where bass sounds most even is your best listening position. It's usually about 38% of the way into the room's length, not dead center.
Use a reference track you know well. Something mixed in a professional studio on high-end monitors. If the bass sounds too heavy in your room, you're hearing boundary reinforcement or a room mode. If the high end sounds harsh, you might have too many reflective surfaces. If the stereo image feels narrow, check your monitor angles.
Room Treatment Basics
Placement alone won't fix a bad room, but it's the first step. Once your monitors are positioned correctly, acoustic treatment addresses what's left: reflections, flutter echo, and bass traps for low-frequency buildup.
First reflection points are critical. These are the spots on the side walls where sound bounces directly from the monitor to your ears. Find them by having someone slide a mirror along the wall while you sit in the listening position. When you see the monitor's tweeter in the mirror, that's a first reflection point. Put absorption there.
Corners trap bass. Low frequencies build up where walls meet. Bass traps in the front corners behind the monitors and the rear corners behind you reduce this buildup. You don't need expensive treatment — dense fiberglass panels work fine.
Avoid overdamping. A completely dead room sounds unnatural and makes mixing harder. You want to control reflections, not eliminate them entirely. Treat the obvious problems first, then listen and adjust.
Practical Application
Most home studios don't have perfect rooms. You work with what you have. Here's the priority order:
- Get the triangle right. Equilateral positioning and proper toe-in angle are non-negotiable. This costs nothing and has the biggest impact.
- Set the height. Tweeters at ear level. Use stands if needed. This is a one-time investment that applies to any monitors you'll ever own.
- Pull monitors away from walls. Even a few extra inches helps. If space is tight, use the monitor's built-in EQ to compensate.
- Center yourself in the room. Symmetry matters more than absolute position. Sit equidistant from side walls.
- Treat first reflections. Absorption panels at the side wall bounce points. This is where room treatment makes the most audible difference.
These steps don't require a big budget or a dedicated room. They work in bedrooms, basements, and spare offices. The goal is to hear your mix accurately enough to make good decisions. Perfect is the enemy of good enough.
Our Recommendations
These monitors represent different approaches to home studio setups. Each includes features that help you adapt to real-world room conditions.


Pioneer DJ DM-50D: The 5" fiberglass woofer and 3/4" soft-dome tweeter are powered by a class-D amplifier delivering 50W total (2 x 25W at 4 ohms). The compact cabinet makes these easy to position in smaller rooms. The DSP switch between DJ and Production modes adjusts the frequency response for different applications. Front-panel headphone output is convenient for late-night sessions when you can't use speakers.
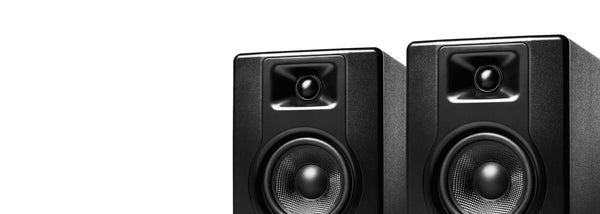
Adam Audio T5V: The U-ART 1.9" ribbon tweeter delivers extended high-frequency response up to 25 kHz. The 5" polypropylene woofer extends down to 45 Hz with a rear-firing bass-reflex port. Bi-amped with 50W for the woofer and 20W for the tweeter, the system reaches a maximum SPL of 106 dB. Rear-panel EQ controls for high and low shelves let you compensate for boundary reinforcement or room brightness. At this price point, the clarity in the midrange is notable.
Genelec 8320A: Built-in DSP with automatic room correction via the GLM software addresses placement compromises directly. The system measures your room's response and applies corrective EQ. This doesn't replace good placement, but it handles what placement can't fix. The 4" woofer and 3/4" tweeter are driven by 100W of Class-D amplification, producing a frequency response of 55 Hz to 23 kHz. The compact die-cast aluminum enclosure fits tight spaces without sacrificing accuracy.
KRK Rokit 5 G5: Three voicing modes and 25-band graphic EQ via the KRK app give you control over how the monitor responds to your room. The front-firing port allows closer wall placement than rear-ported designs. Bi-amped with up to 55W of Class-D amplification, the 5" woofer and 1" silk-dome tweeter deliver accurate transient response. The LCD on the back panel makes adjustments straightforward without needing a computer.
Explore Mentioned Brands
FAQ
How far should studio monitors be from the wall?
The standard guideline is at least 12 inches from the rear wall, but this varies by monitor design. Rear-ported monitors like the Adam Audio T5V need more space — 18 to 24 inches if possible. Front-ported designs like the KRK Rokit 5 G5 are more forgiving in tight spaces. Compact monitors with smaller woofers can work closer to walls. If your room is small, use the monitor's low-frequency EQ to reduce bass buildup from boundary reinforcement.
Should studio monitors be angled up or down?
Tweeters should aim directly at your ears when you're seated. If monitors are on stands above ear level, angle them down slightly. If they're below ear level on a desk, angle them up or raise them with isolation pads. The goal is to sit on the tweeter's axis — that's where the frequency response is flattest.
Can I put studio monitors on their side?
Not recommended. Monitors are designed to be used vertically. Placing them horizontally changes how the drivers interact and narrows the stereo sweet spot. The vertical arrangement of woofer and tweeter creates a specific dispersion pattern. Rotating the speaker compromises this. If desk space is limited, use smaller monitors or stands instead.
Do studio monitors need to be the same height?
Yes. Both tweeters should be at the same height and at your ear level when seated. Uneven height creates an unbalanced stereo image and changes how the frequency response combines at the listening position. Use a tape measure to verify both monitors are identical in height and distance from your ears.
Conclusion
Proper monitor placement transforms how you hear your mixes. The equilateral triangle, ear-level tweeters, and adequate wall distance form the foundation. These aren't optional tweaks — they're requirements for accurate monitoring. Your room will always have compromises, but starting with correct positioning gives you the best chance at hearing what's actually in your mix. From there, room treatment and monitor calibration features handle what placement can't fix. Set up your monitors right once, and every mix you make benefits.


