


How to Set Up a Home Recording Studio from Scratch
Building Your First Home Recording Studio
You want to record music at home. Maybe you're tracking demos, producing beats, recording a podcast, or finally capturing those song ideas before they vanish. The good news: you don't need a massive budget or a dedicated room to start. The challenge is knowing what gear actually matters and what's just nice to have later. This guide walks you through the essential components of a functional home recording studio and how to set them up properly. By the end, you'll know exactly what to buy first and how to connect it all.
The Core Components You Actually Need
A working home studio has four essential pieces. Everything else is an expansion or upgrade. Here's what you need on day one:
- Audio interface: Converts analog sound (your voice, guitar, keyboard) into digital audio your computer can record. Also converts digital audio back to analog so you can hear it through speakers or headphones.
- Microphone: Captures vocals, acoustic instruments, guitar amps, room sound. A large-diaphragm condenser mic is the most versatile first mic for most home studios.
- Headphones or studio monitors: You need to hear what you're recording and mixing. Closed-back headphones are the budget-friendly starting point. Studio monitors are better for mixing but require acoustic treatment to sound accurate.
- Recording software (DAW): Digital Audio Workstation software like Ableton Live, Logic Pro, Studio One, or Reaper. Most audio interfaces include a free or lite version to get you started.
Notice what's missing from that list: MIDI keyboards, outboard gear, mic stands, cables, pop filters. Those matter, but they're not blocking you from recording your first track. Start with the four essentials. Add the rest as you go.
Choosing Your Audio Interface
The audio interface is the bridge between your instruments and your computer. It handles the actual sound quality of your recordings, so this is not the place to cheap out aggressively. That said, you don't need a $2,000 interface to make professional recordings. You need one that matches your workflow.
Ask yourself two questions:
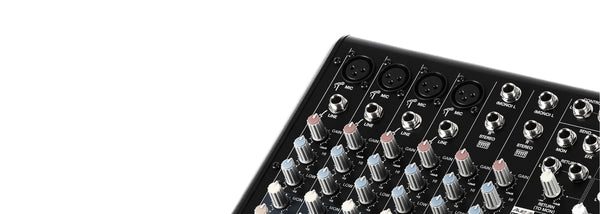
- How many things do I need to record at once? If you're recording yourself — vocals, guitar, MIDI keyboard — a 2-input interface is plenty. If you're recording a full band live or miking a drum kit, you need 8+ inputs.
- What preamp quality do I need? The preamp amplifies your microphone signal to a usable level. Budget interfaces have functional preamps. Mid-range interfaces have cleaner, quieter preamps that make a noticeable difference with sensitive condenser mics.
Most home producers start with a 2-input interface. It covers vocals, guitar, bass, and line-level synths. You can always expand with ADAT or add a second interface later if you need more channels.
USB connectivity has evolved significantly. Modern interfaces use USB-C, which offers faster data transfer and lower latency than older USB 2.0 connections. Some budget interfaces still use USB 2.0, which is perfectly functional for 2-channel recording but may limit your ability to expand later. If your computer only has USB-A ports, you can use the appropriate cable — the interface will work at whatever USB standard it was designed for.
Latency Matters More Than You Think
Latency is the delay between playing a note and hearing it through your headphones. High latency makes recording feel sluggish and throws off your timing. Modern interfaces keep latency under 5ms at standard buffer sizes, which is imperceptible. Older or poorly-designed interfaces can hit 20-30ms, which is unusable.
Look for interfaces with dedicated low-latency monitoring. This routes your input signal directly to your headphones without passing through the computer first. You hear yourself in real time, even if your DAW is running heavy plugins.
Microphone Basics for Home Recording
Microphones fall into two broad categories: dynamic and condenser. Each has a role.
Dynamic mics are rugged, handle high sound pressure levels, and don't need phantom power. They're ideal for loud sources like guitar amps, snare drums, and live vocals. The Shure SM57 and SM58 are industry-standard dynamics you'll see in studios and on stages everywhere.
Condenser mics are more sensitive, capture more detail, and require phantom power (48V, supplied by your interface). They're the go-to for vocals, acoustic guitar, piano, and room ambience. Large-diaphragm condensers are the most common first mic for home studios.
For a first microphone, get a large-diaphragm condenser. It's versatile enough to handle vocals, acoustic instruments, and even guitar amps if you place it right. A dynamic mic is a better second purchase once you know what you're recording most often.
Polar Patterns Explained
Polar pattern describes which direction the mic picks up sound from. The three most common patterns:
- Cardioid: Picks up sound from the front, rejects sound from the sides and rear. This is the standard for most recording. It isolates your source and minimizes room noise.
- Omnidirectional: Picks up sound equally from all directions. Useful for capturing room ambience or recording multiple people around a single mic.
- Figure-8 (bidirectional): Picks up sound from the front and rear, rejects the sides. Used for specific techniques like mid-side stereo recording.
Start with a cardioid mic. It's the most forgiving in untreated rooms.
Headphones vs Studio Monitors
You need something to monitor your recordings. Headphones are the practical starting point for most home studios. They're cheaper, they work in any room, and your neighbors won't hear your 2am mix sessions.
Closed-back headphones isolate sound — what you hear stays in your ears, and outside noise stays out. This is critical during tracking. If your headphones leak sound, your mic will pick it up and you'll have bleed on every take. Closed-back designs are essential for recording vocals and acoustic instruments.
Open-back headphones sound more natural and are less fatiguing for long sessions, but they leak sound in both directions. Save these for mixing, not tracking.
Studio monitors are active speakers designed for accurate sound reproduction. They show you exactly what's in your mix — the good and the bad. Monitors are better than headphones for mixing because you hear sound in a physical space, not directly in your ear canals. This gives you a more natural sense of stereo width, depth, and how low frequencies interact with the room.
The catch: monitors only sound accurate in a treated room. In a bedroom with bare walls and hard floors, reflections and resonances will mislead you more than good headphones will. Bass buildup in corners makes everything sound bass-heavy. Flutter echo between parallel walls adds harshness. You compensate for these problems in your mix, then your tracks sound wrong everywhere else.
If you're just starting out, get closed-back headphones. Add monitors later when you're ready to invest in basic acoustic treatment. A pair of decent headphones in an untreated room will give you more reliable results than expensive monitors in that same space.
Acoustic Treatment 101
Your room affects your recordings more than your microphone does. A $100 mic in a treated room will sound better than a $1,000 mic in a bare bedroom. Acoustic treatment is not soundproofing — you're not trying to keep sound in or out. You're controlling how sound behaves inside the room.
Untreated rooms have two main problems:
- Flutter echo: Sound bounces between parallel walls, creating a metallic ringing. Clap your hands in an empty room — that harsh tail is flutter echo.
- Bass buildup: Low frequencies accumulate in corners, making your mixes bass-heavy. You compensate by turning down the bass, then your mix sounds thin everywhere else.
Basic treatment addresses both issues with absorption and bass trapping. You don't need to cover every wall. Strategic placement in corners and first reflection points makes a massive difference.
First Reflection Points
When you're sitting at your desk, sound from your monitors hits the side walls, ceiling, and desk surface before reaching your ears. These early reflections blur your stereo image and smear transients. Treat them first.
To find your first reflection points: sit in your mix position and have someone hold a mirror flat against the wall. Move the mirror until you can see your monitor's tweeter in the reflection. That's where you need absorption. Repeat for both side walls and the ceiling if possible.
Cable Management and Connections
Cables are boring but critical. Bad cables add noise, intermittent connections, and random dropouts. You don't need boutique cables, but you need functional ones.
XLR cables connect microphones to your interface. They're balanced, meaning they reject electromagnetic interference from power cables, computer monitors, and Wi-Fi routers. Always use XLR for microphones. Minimum 10ft length gives you flexibility in mic placement.
TRS cables (tip-ring-sleeve, the ones with two black rings on the plug) are balanced and used for line-level connections — studio monitors, outboard gear, patch bays. TS cables (one black ring) are unbalanced and used for instruments like guitar and bass.
USB cables connect your interface to your computer. Use the cable that came with your interface. If you need a longer cable, buy a quality cable from a reputable brand. Cheap USB cables cause random disconnects and glitchy audio.
Keep your signal cables away from power cables. When they run parallel, AC hum can couple into your audio signal. If you must cross them, do it at a 90-degree angle.
Setting Gain Structure Properly
Gain structure is how loud your signal is at each stage of the recording chain. Set it wrong and you'll either record too quiet (and amplify noise when you turn it up later) or too loud (and clip the input, causing distortion).
Here's the process:
- Set your interface's input gain to minimum.
- Start recording and perform at your loudest expected level — sing the chorus, hit the strings hard, whatever your peak moment is.
- Slowly turn up the input gain while watching your DAW's input meter.
- Stop when your peaks hit around -12dB to -6dB. This gives you headroom for unexpected loud moments without clipping.
Most modern interfaces have clip indicators — a red light that flashes when you hit 0dB. If you see red, turn the gain down. Clipping is not fixable in post. It's permanent distortion.
Some interfaces now include auto-gain features that set levels for you. These work well for spoken word and podcasts. For music, manual gain setting gives you more control.
Software and Workflow Setup
Your DAW is where you record, edit, mix, and export your music. Popular options include Ableton Live, Logic Pro (Mac only), Studio One, Reaper, and Pro Tools. Most audio interfaces include a free or lite version of a major DAW. Start with that before spending money on software.
DAWs have different strengths. Ableton Live excels at electronic music and live performance. Logic Pro is deep and Mac-integrated. Studio One has an intuitive workflow for recording bands. Reaper is affordable and infinitely customizable. Pro Tools is the industry standard in professional studios.
The best DAW is the one you'll actually learn. Pick one, watch tutorial videos, and stick with it long enough to get comfortable. Switching DAWs later is painful — all your muscle memory and shortcuts reset.
Essential Plugins to Start
Your DAW includes stock plugins. Learn them before buying third-party plugins. Most DAWs ship with:
- EQ: Shapes frequency balance. Cut mud around 200-400Hz, add presence around 3-5kHz, tame harshness around 8kHz.
- Compressor: Controls dynamic range. Makes quiet parts louder and loud parts quieter. Essential for vocals and bass.
- Reverb: Adds space and depth. Use it sparingly — too much reverb makes everything sound distant and muddy.
- Delay: Creates echo effects. Slap delay on vocals, rhythmic delay on guitars, subtle delay to widen synths.
Stock plugins are not inferior. Many professional mixes use only stock tools. The limitation is your skill, not the plugin.
Common Beginner Mistakes to Avoid
New recordists make predictable mistakes. Here's how to skip them:
Recording too quietly. You're afraid of clipping, so you set your gain conservatively. Your peaks barely hit -20dB. Now your recording is buried in noise floor. When you turn it up in the mix, you amplify all that noise. Record hot enough that your peaks hit -12dB to -6dB. You have headroom, but you're not wasting your interface's dynamic range.
Monitoring through your DAW during tracking. This adds latency. You play a note, and you hear it 20ms later. Your timing drifts. Use your interface's direct monitoring instead. You hear yourself in real time, with zero latency.
Skipping acoustic treatment. You spend $500 on a microphone and record in a bare bedroom. The mic captures all the room reflections, comb filtering, and resonances. Your vocal sounds boxy and amateur. Even basic treatment — a few foam panels in corners, a blanket behind the mic — makes a huge difference.
Not using a pop filter. Plosives (P and B sounds) create bursts of air that hit the mic capsule and cause low-frequency thumps. A $15 pop filter eliminates this. Put it 2-3 inches in front of the mic.
Recording in the same room as your computer. Computer fans, hard drive noise, and mouse clicks bleed into your recordings. If possible, set up your recording space away from your computer. Use longer cables. If you can't separate them, record during quiet moments and use a noise gate in post.
Expanding Your Setup Later
Once you've recorded a few projects, you'll know what you need next. Common upgrades include:
A second microphone. If you started with a large-diaphragm condenser, add a dynamic mic for guitar amps and loud sources. If you started with a dynamic, add a condenser for vocals and acoustic instruments.
Studio monitors. Once you've treated your room, monitors give you a more accurate picture of your low end and stereo field than headphones can.
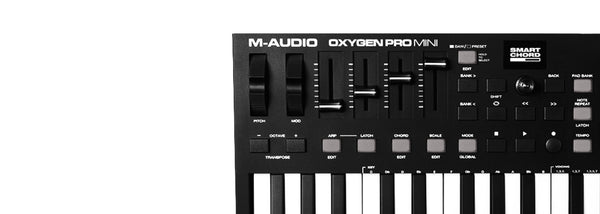
MIDI controller. If you're producing electronic music or programming virtual instruments, a MIDI keyboard speeds up your workflow. You can play parts instead of drawing them in with a mouse.
More inputs. If you're recording multiple people at once or miking a drum kit, you'll need an interface with 8+ inputs. Many 2-input interfaces have ADAT expansion, letting you add 8 more channels with an external preamp.
Outboard gear. Hardware compressors, EQs, and preamps add color and character that plugins can't perfectly replicate. But they're expensive and require knowledge


